Cynthia, that looks great! You are really doing a super job. I have been thinking a lot about getting back into a more traditional scrapbooking routine. I do not take nearly the number of photos you do, so it shouldn’t be that hard…right? You are inspiring me.
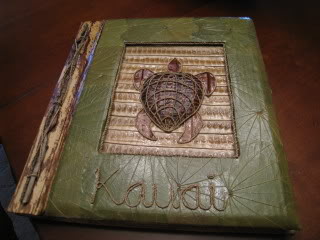
HAWAII ALBUM
- By : Cynthia
- Category : Hobbies, Vacations - 2009
Hobbies
11

Do you remember the Hawaii album I mentioned awhile back? I’ve been trying to work on it a little bit each day. So far so good in regard to my stated goal to keep it simple. Now, I know some of you are already rolling your eyes and you’re probably going to look at these pages and think, “yeah right.” I know this because some IRL friends have already said this to me (LOL). It is simple for “me” and I’ll explain why as we go through each page.
First another FYI. Some of you know I’m taking Stacy Julian’s online LOM class through Big Picture Scrapbooking. I do hope to find time to post about that class very soon, but for now I simply (see there’s that word again….. I really AM trying to simplify things) want to mention that a couple of weeks ago our assignment was to scrap in a traditional store bought photo album you would purchase somewhere like Target or one of the hobby stores. Here is Stacy’s idea for this particular Stacy lesson:
You are going to use this ready-to-go photo album as the foundation for a scrapbook. Instead of blank 12×12 or 8 1/2 x 11 canvas of cardstock that calls for complete creativity, you have simply empty pockets, or sleeves, that invite a little “personalization”, and then they can do so much more than just hold or display uncropped photos. A photo album becomes a scrapbook when you add to it, or bring to it, I should say, a concept and your creativity. It enables you to preserve safely and in a very FUN and relatively quick way, lots and lots of pictures.
Having already done this to an album a few times in the past, this is not a new concept for me and I can confirm that it is definitely a very fun and FAST way to create a quick and easy scrapbook. It will require some (especially my fellow Creative Memories scrapbookers) stepping outside of your comfort zone, but you really have nothing to lose! Let me know if you decide to give it a try. I’d love to see your pictures.
 Our assignment was to do a small album and we were to consider doing a larger one which would hold 50-200 pictures. So, my album is made to hold 100 pictures and worse than the limited number of photos it holds is the fact that ALL of the photo slots as seen above are meant for VERTICAL pictures. At least 1/2 of mine are horizontal. So, I knew before I even purchased this album that I was going to have to do some significant alterations to make this work. My family has no faith in me whatsoever. In fact, Emily kept trying to convince me that I should buy 2-3 albums (LOL), but I’m on a mission to simplify, pare down, and speed things up so one album it is! I have 541 vacation pictures which WILL GO IN THIS ALBUM one way or another (LOL)! So, I’m only a little over the suggested goal, but what can I say? You’d be shocked if I didn’t make this a larger and more complicated project than called for, right? Ok.. so on to the album!

PAGE ONE (above left): The left side is the back side of the album front shown up above. There weren’t any photo slots here, but that didn’t stop me from adhering 5 pictures to it! I adhered the orange chipboard letters right to the photo in the upper left hand corner. SIMPLE TIP: I didn’t measure where the letters were going nor did I use a ruler to make sure they were level. That saved me at least a good hour!
PAGE TWO (above right): If you look a little further up in this post you can see that piece of tissue paper looking material which is inbetween every page in this album. At first I was going to tear them all out. Fortunately, before I did that I realized they were my ticket to more than tripling the # of pictures this album was made to hold! The above right page is stapled onto that tissue paper type material. I taped the center of the tissue paper on both sides to help keep it from tearing. So far so good. And, I used doubled sided adhesive to attach the back of this page and the back of the next page together so there is less pressure on the tissue paper AND for added measure I stapled both of those pages together in the corners. Since this album is longer than 12 inches the 12×12 paper isn’t long enough to make a new page so I have to add some length to each one. SIMPLE TIP: I didn’t use a ruler to mark the exact line for the word strip that hides where the 2 pieces of paper come together. That saved me quite a bit of time! I will journal on the computer, print it out on a clear overhead projector sheet and then attach it over the top. It should look nice with the colorful background being visible underneath.

PAGE THREE (above left): This is the backside of the sunshine page above. I need to make room for LOTS of extra photos so I made these 2 flap thingies. When you lift them there will be additional pictures underneath. Right now I only have one extra picture on the back side of the right flap show below. I’m waiting to put the rest of the pictures on this page because whatever is left over will go here.

PAGE FOUR (picture above this one above right) existing page. The picture in the top right hand corner was a horizontal picture that I cut down to a 4″ size and added a border that matches the opposite page. That’s one way I plan to use more of my horizontal pictures in the vertical slots. The bottom left picture is actually 3 pictures adhered to cardstock and slipped into the slots as one piece.

PAGE FIVE (above left): I wanted to use that cute picture of Tater with the date in the sand as a title so I did take a few minutes to measure a piece of paper that would fit into the far corners of the intended slots for 2 pictures. I put his one picture over the cardstock and put the cardstock through the slots.
PAGE SIX (above right): I carried the same card stock over to the other page and added a length of journaling cardstock. Again, I taped the edges of the tissue paper. SIMPLE TIP: I didn’t measure the holes where I attached the raffia. That saved a TON of time! The photo holder on the right side is a 12×12 six-up photo sheet that would go in a 3-ring binder. I punched a hole in the card stock and attached the brads to hold it together. Then, I added a little tab that says “TURN”. When you turn that flap it opes up to show the other 6 pictures that are on the back side. I used my label maker to make some very quick and easy titles which I put right on the protector.
 When you close it back up and flip to the back side (I know it’s confusing, but I don’t know how else to show this), you can see the last 3 of 12 pictures plus I have a spot for 2 more pictures. One that I’ve already adhered and I’m saving a spot for either another picture or another journal box. I will probably use these 6 up sheets quite a bit because it’s a VERY FAST way to add 12 pictures to ONE PAGE and they don’t take up much room since I have to fold them in 1/2 to get them to fit on the page. See picture below.
 PAGE EIGHT: (above right) Yes. I know this is out of the order, but I have nothing to say about this page and a lot to say about page seven.PAGE SEVEN: (above left): I didn’t want to get stuck in a rut of doing the same thing on each page. This has been HARD for me because normally I would a) only wait to scrapbook until my friend Lisa is here and b) not scrap a page until I had looked through hundreds of idea books, websites, magazines, etc., for “just the right look.” SIMPLE TIP: I haven’t looked at a single idea and I haven’t waited for anyone to tell me what to do (LOL). That has sped up the progress by a couple of years, I’m sure! On this page, I decided to make a flap/lap book. This was a little tricky and a bit time consuming, but worth the effort because I needed a space for a LOT of horizontal pictures so I couldn’t simply fold the edges of a folder into the center because they wouldn’t leave me a wide enough space. So, I basically had to make my own “folder”. You can see how I cut the page and moved the pieces of that first page to the outer edges and added a 2nd complimentary patterned page to the left side. The right side is where the flap opens as indicated by the little taggy thing that says “open” (LOL). And, I didn’t want it to lay exactly flat so people would know to open it so I added that pom pom type ribbon as a book marker so to speak. This is what it looks like when you open it up:
 I needed to fit MORE than 3 pictures on that left side flap and I needed something quick and easy after spending so much time on the flap book itself. SIMPLE TIP: I stacked 2 or 3 pictures together, stapled the edges, and bent a crease in the side of the picture so they open like a little mini book. See picture below:

PAGE NINE (above left): Again, nothing much to stay about this page. Em added a few cute little doodads which I’ll mention below.
PAGE TEN: (above right): Em helped create this page since it’s HER page. We used a plain white sheet of cardstock to make the extra page which was again stapled, taped, and adhered to the page on the back side with double sided adhesive. We used another one of those 6 up photo sheets for a 3 ring binder using large brads to attach it to the card stock underneath. We used some cute pink paper to make a sidebar title with the embellishments all coming from this CHIP thing which I’ll post below. When you open up this photo sheet you find 5 more pictures plus a journal box.


PAGE ELEVEN: (above left). Again, not wanting to get stuck in a rut, Em helped me think of something different. This was a VERY FAST page to put together since I didn’t measure anything (LOL)! WE made a little memorabilia pocket You can see the 3 tags on pictures sticking out of the pocket. There is another picture on the back side of each of the pictures. So, a total of 6 pictures in that pocket with a coaster from the bike rental place as the decorative touch for the front of the pocket.
PAGE TWELVE: (above right). Nothing fancy. Three pictures and a journal box.
So, what do you think? Pretty simple, huh? At this rate, I just might finish this album in another week or so! YEA! I think once I actually complete something, I’ll be on a roll and just might finish up some of my other vacation and mini vacation album projects.
DISCLAIMER (especially for DeEtta): This is NOT how I scrapbook my “regular” albums. My regular albums really are bascially simple!


