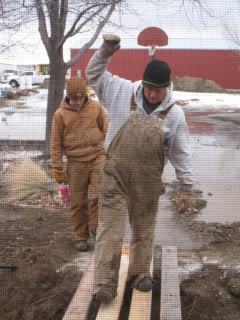
 Today’s Thursday Thirteen is a photo journey detailing how to install a drip system in your flower bed. I’m only talking about the part *I* know how to do which begins after the main tube has been buried in the grass, pushed under the cement curbing, and is laying in the flower beds. If anyone wants specifics on getting to that point, they’ll have to talk to Tim because that is out of my league. I helped him, but I don’t really know how to do that myself and honestly couldn’t do it by myself either. I’ve had lots of practice with the drip system though.
First a little history. Last year when dh installed the drip system, the man who helped us said we should put the drippers right into the main tube and attach the flexible tube to the dripper leaving an open ended tube going to our plants. Our experience over the last year has been that over time the small tubing has been pushed off from the dripper after months of suffering the initial bursts of water pressure each time we start the system. This srping, I started going back to each plant adding a barb to the main tube and putting the dripper at the end of the flexible tube right at the base of the plant. Now we aren’t having any trouble with the dripper coming off from the tube and I hope to not have to spend so much time in these flower beds next year. I hope to be putting in some NEW ones instead (LOL)….. hoping Tim doesn’t read this part of the blog until I have time to convince him we should do a few more flower beds. I’m supposing one of the guys in the band will probably spill the beans since I know a couple of them read the blog!
Here’s how we install our drippers:
1. Lay the main tube throughout the flower bed on top of the ground or fabric mat.
 2. Hold in place with these metal stakes. We used two of them. One of each side of the main tube.
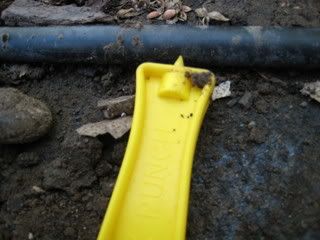
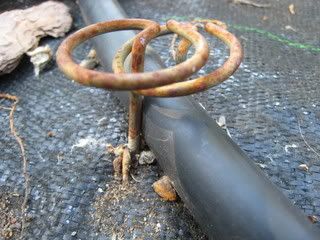 3. Use yellow tool to poke a hole in the main tube. Of course, I don’t know the real name of this tool, but around here it’s referred to as the “yellow tool.” I try to make sure that I poke the hole right in the middle of the tube. Turn the yellow tool a few times to make sure you have the hole punched through enough to easily attach the 1/4 ” barb.
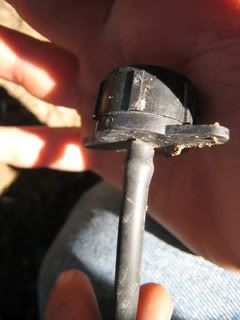
 4. Push the end of the flexible tube onto a 1/4″ barb. Be sure the tubing goes all the way onto the barb so it won’t be blown off by the water pressure.
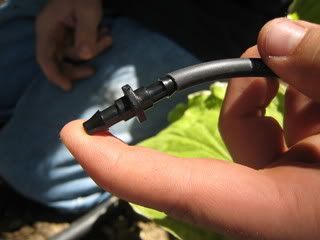 5. Plug the 1/4″ barb into the hole in the main tubing. This part KILLS my fingers! I tried some pliers once, but it broke the barb.
 6. Measure how long the flexible tube needs to be to reach from the main tube to the center of your plant and use scissors to cut at desired length.
7. Chose the right size dripper. We have used mostly 1 gallon (left) and 3 gallon (right)
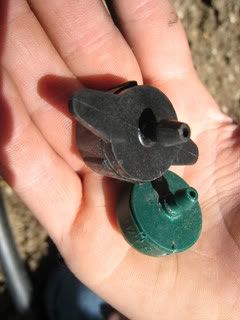 as well as a few bubble drippers which I can use to adjust the flow for larger bushes/trees. I can open those wide to deep water every few weeks and close it off completely when I don’t want the bushes and trees to get the regular watering that the smaller plants get. 8. Attach dripper to one end of the measured flexible tube. Be sure to push it all the way to the back side of the dripper so, again, it won’t be blown off by the initial burst of water pressure.
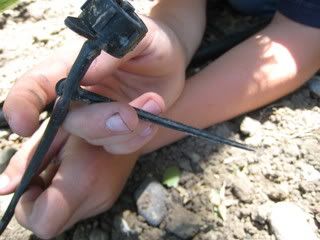
 9. Attach a stake to the flexible tubing by pinching it together and sliding into the hook part of the stake. You’ll want to use a stake especially if you have animals (cats, dogs, or WILD ones – we’ve found several signs of porcupines in our flower beds) that will be walking through your beds. Last year we didn’t use the stakes initiallyand after less than a month I realized we needed SOMETHING to hold the dripper in the right spot.
 10. Insert stake into the flower bed usually at the center of the plant. Some of our plants have spread out so much this year that I’ve gone back and added a 2nd dripper to another area of the plant.
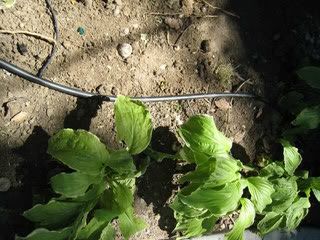
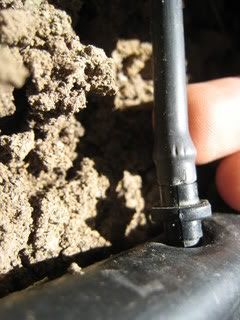
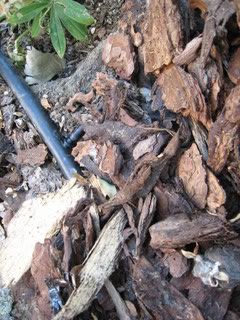
11. Place bark over the tubing to help hold it in place and cover it up. Here the bark is right up to the 1/4″ barb. I’ve been leaving some of the newer ones uncovered until I know for sure everyting is working right then I’ll go back and cover it up. I’ve also been using some larger pieces of bark to “mark” where the barbs are incase I need to go back and check them for any reason…. easier to find that way than digging around in all the bark (and bugs).
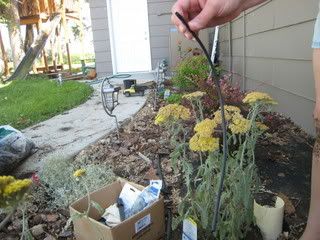
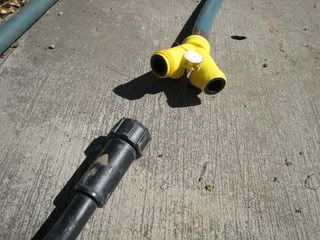
 12. Turn the water on and make sure water is flowing out through each dripper. We don’t have our underground sprinklers installed yet so I run a garden hose from the pump to the beginning of our drip system’s main tube. Garden hose green/yellow and drip system tube connector in black. It amazes me that this thing runs around the entire perimeter of our house and there is plenty of water for all of the plants. One of these days I’m going to go around and count them all (LOL). It’s very easy for me to make sure there isn’t a problem somewhere along the line by checking the very last plant. If there seems to be the right amount of water coming out of that dripper then I know all is well. And, if I walk around the entire house and simply listen for RUNNING water then I can also tell if there’s a problem. If I hear running water then I know that one of the drippers has come off. I don’t have that problem very much anymore now that I’m gone almost all the way around each flower bed adding the barbs.
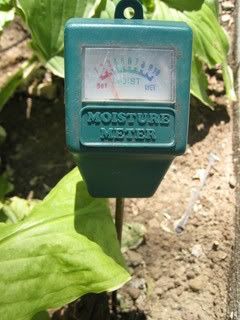
 13. Every once in awhile use a water gauge to determine if the plant is getting the right amount of water and change drippers as necessary. This spring I’ve changed a dozen or so of the drippers from the 1 gallon to the 3 gallon because the plants of grown so much since last year.
I hope you enjoyed this Thursday 13 post. I want to thank my friend, Laquita, for the inspiration for this entry. We were talking about drip systems the other day and I told her I would blog mine for her since we don’t live close enough for her to just drive over and take a “real” look. I’m a week late in posting this and she’s probably already done with her system. But, better late than never, right?